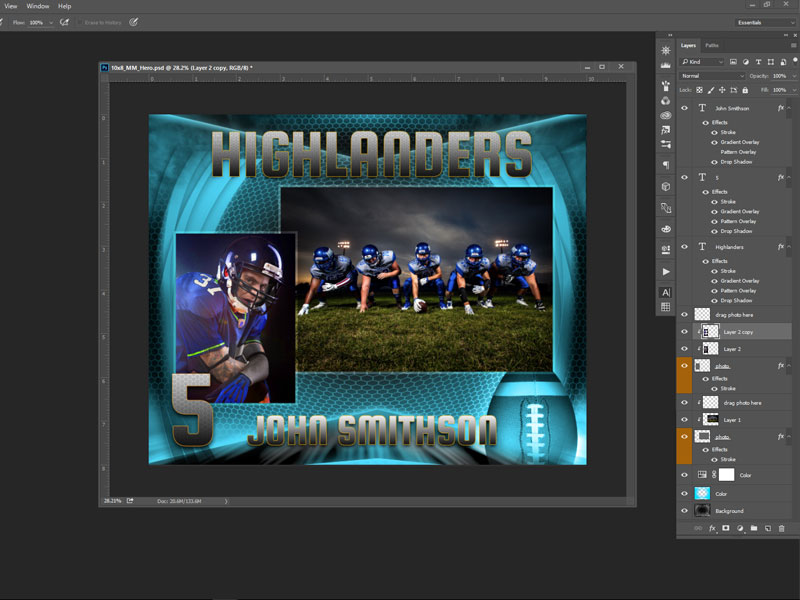
This is a Photoshop tutorial for the easy method to add images into arc4studio‘s templates. Please note that an empty “clipped” layer is on top of each frame holder as part of the templates multilayered structure. In this tutorial we used a memory mate from the Football Legends series of 9 Photoshop templates.
1. Open documents as separated windows not in tabs
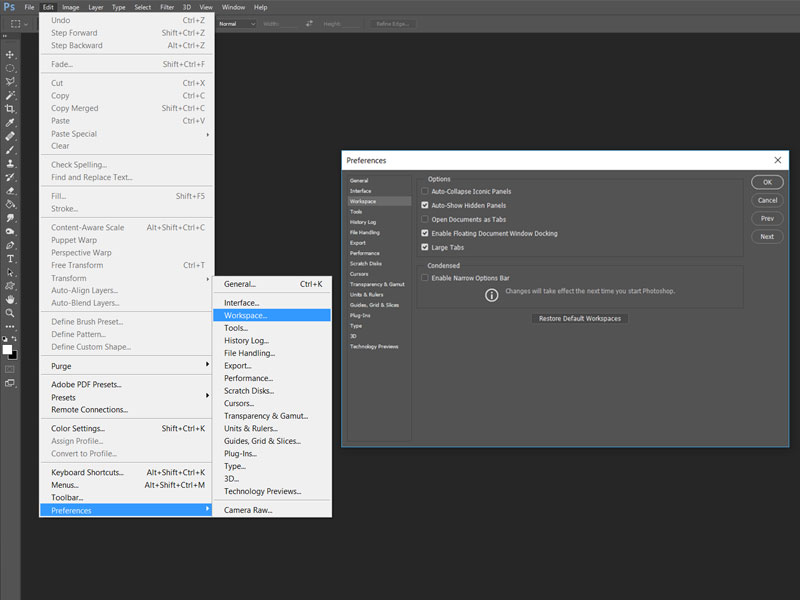
Go to top menu Edit / Preferences / Workspace and uncheck the “Open Documents as Tabs”.
For Mac users go top bar Photoshop / Preferences / Workspace
2. Use the Move tool and turn on Auto-Select and Show Transform Controls
Using the Move tool (shortcut:V) once you click on a layout’s element (decoration overlay, frame holder, text, etc) you have total control over it and you can select, move, resize, delete, etc.

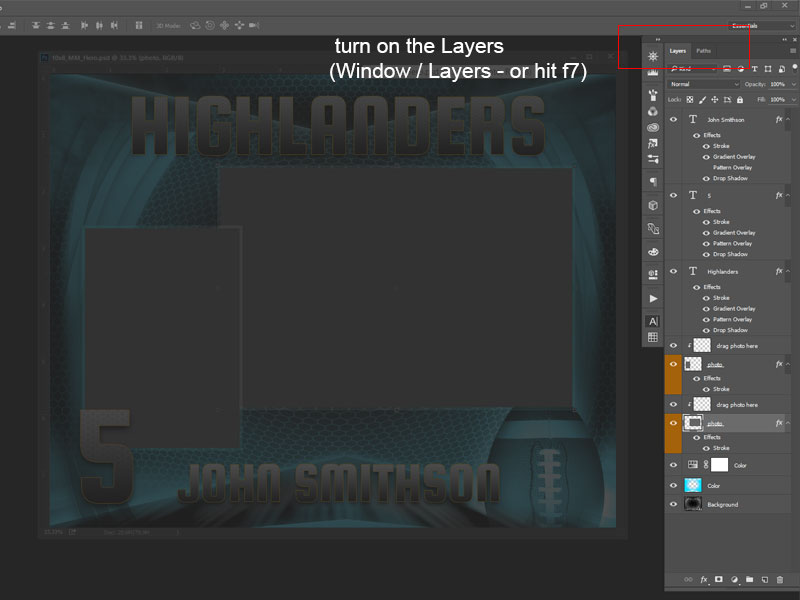
3. Have always the Layers window open
If the Layer’s palette is not on the screen (usually is located on the right side), go on top menu Windows / Layers (shortcut: f7).
Adding Images – Drag and Drop
4. Open Image
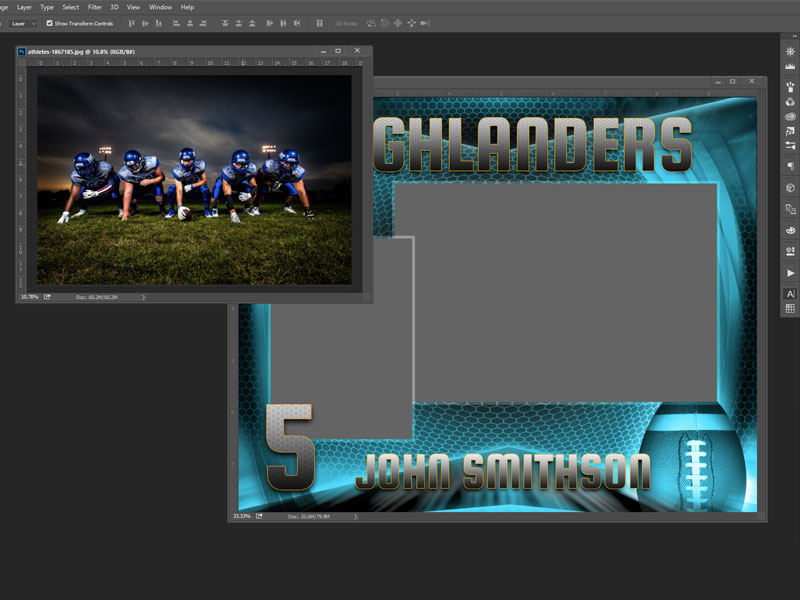
As you can see in the picture, the template document and the image are on different windows (not tabs).
5. Add Image – Drag and Drop
- At the template, using the Move tool (V), click on the photo frame holder where you want to place the image
- Go to the image, click on it and hold the mouse button down
- Holding the mouse button down, drag the image over the template (you’ll see the document border highlighted)
- Drop the image (release the mouse button
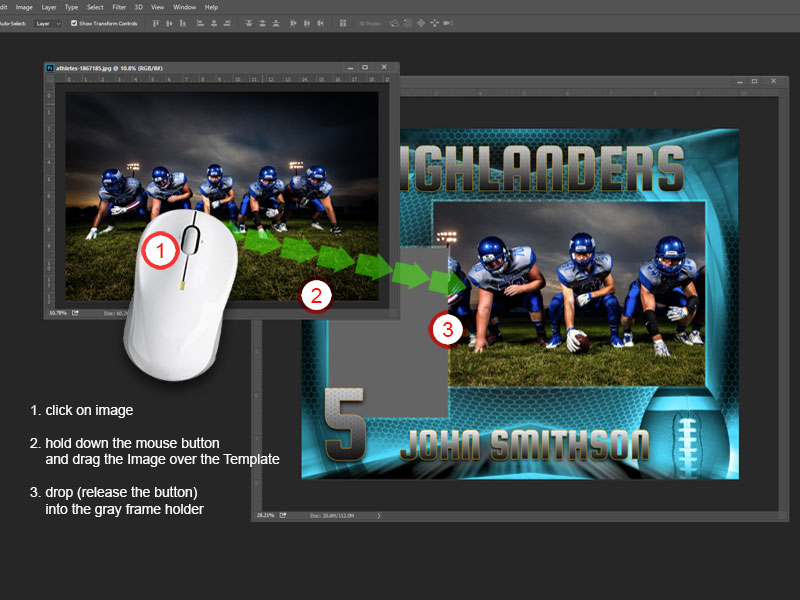
6. Adjust the image
Resize, repose, do all the adjustment necessaries.
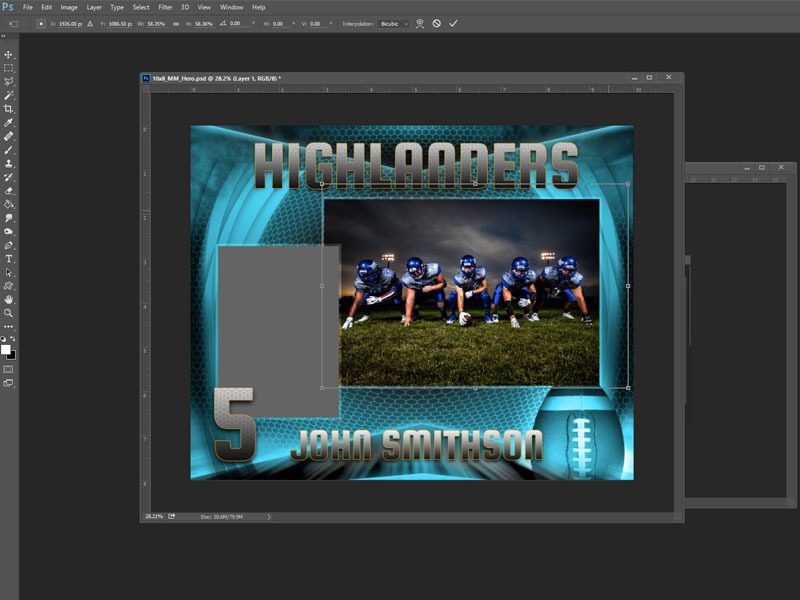
7. Complete the layout
Repeat the same steps and add a new image if it’s the case.
