How to use arc4Studio template (in depth)
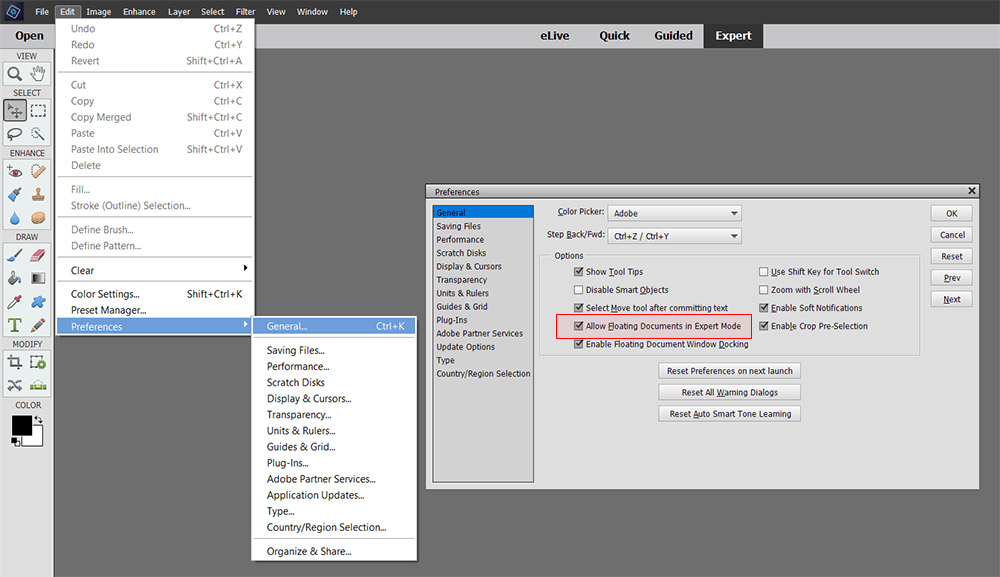
This is a complete tutorial on how arc4Studio’s templates works in Photoshop Elements. We recommend an initial setup for the open documents as individual floating windows. For that, go to Edit – Preferences – General and check “Allow Floating Documents in Expert Mode“.
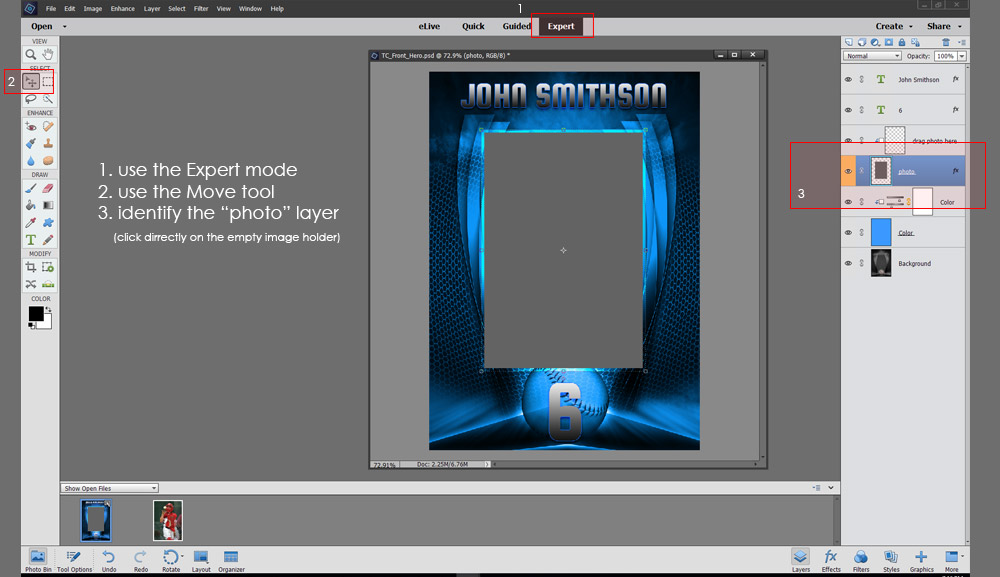
To start, we need to be in the Expert mode, to see the Layers (onto the right side of the screen) and to use the first tool from the “Select” section, the Move tool.
Important: before opening a template, please read carefully the product description and install first all the fonts necessaries into your system. (see the links to download the suggested fonts)
1. Add Images (drag and drop)
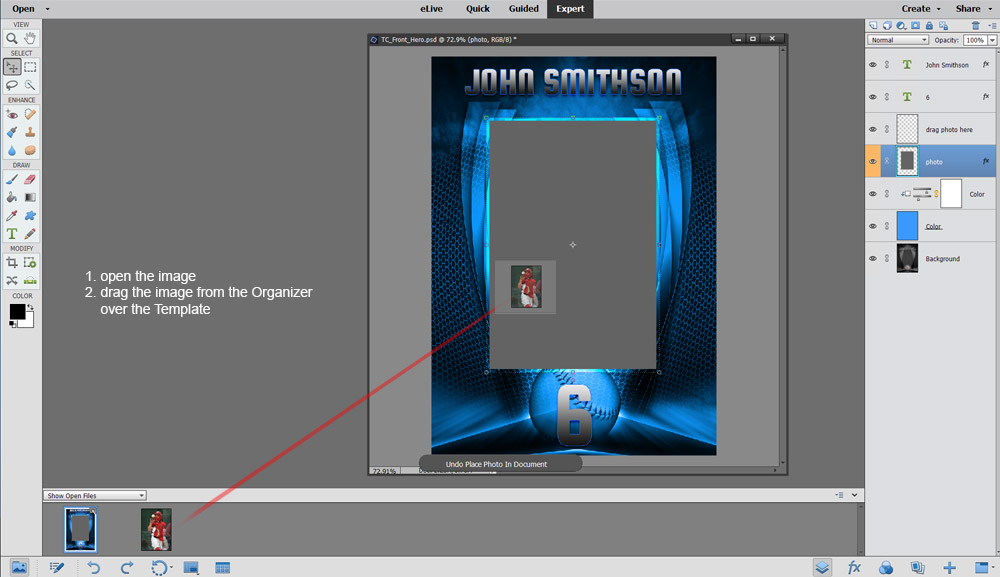
Now, open the arc4Studio template and select the empty frame holder where you want to place your image. Some of the templates have more than one frames, but the workflow of adding images is the same. Take a look on the Layer’s structure and see the layer “photo” selected.
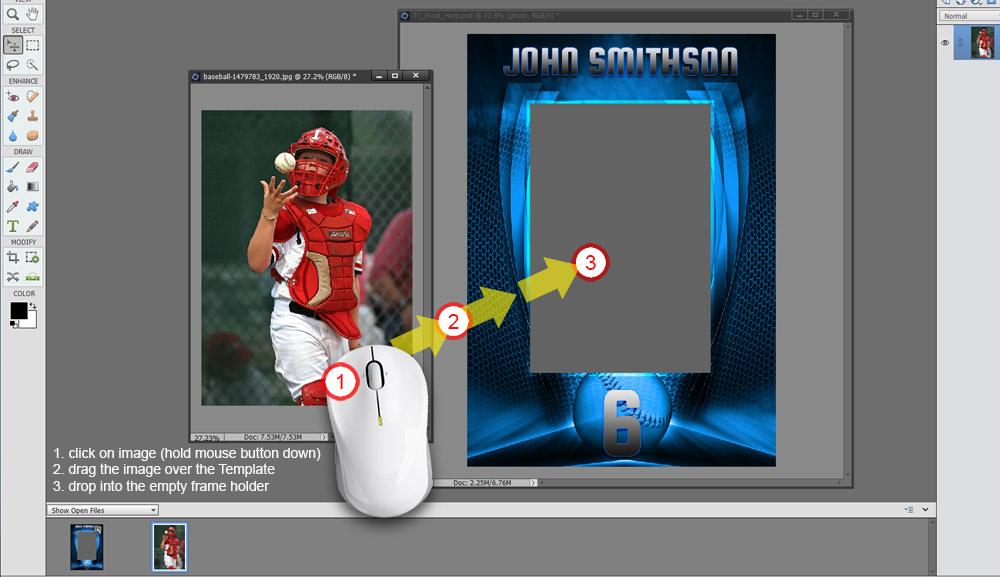
Open the image(s) that you want to use. You can drag the image directly from the Organizer (Show Open Files) and drop into the Template or you can open the Image document, click on it and hold the mouse button down while you dragging on top of the Template and drop it there (release the button).
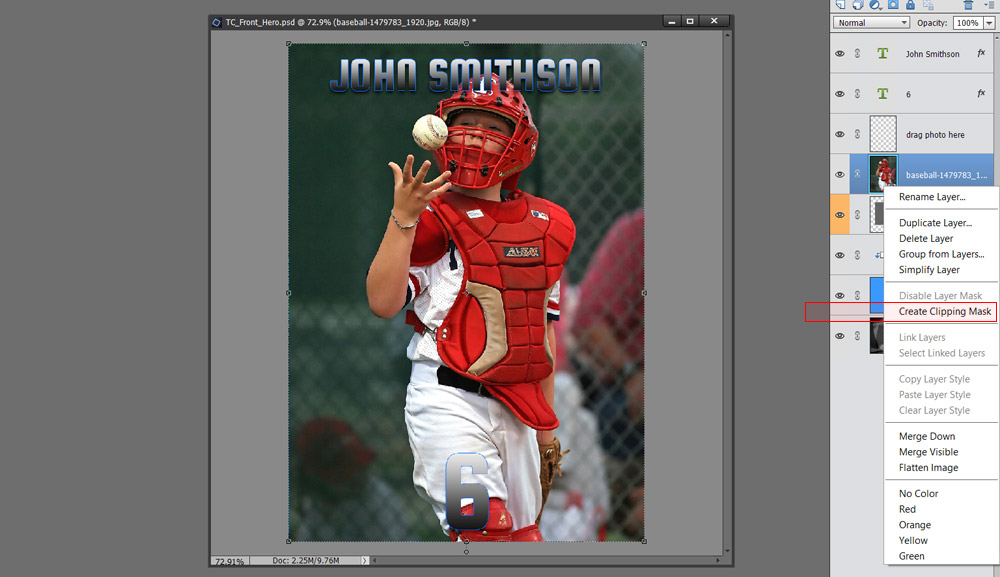
Under the Layers, check if the new added image layer is right above the frame holder layer named “photo”. If not, select the layer and move it up/down to be on top of the “photo” layer (see the image).
Right-Click on the image layer (ctrl+Click on Mac) and choose “Create Clipping Mask”. In Photoshop CC or CS this action is not necessary, the new added image will be clipped automatically because the “drag photo here” layer. In Photoshop Elements you should do it manually.
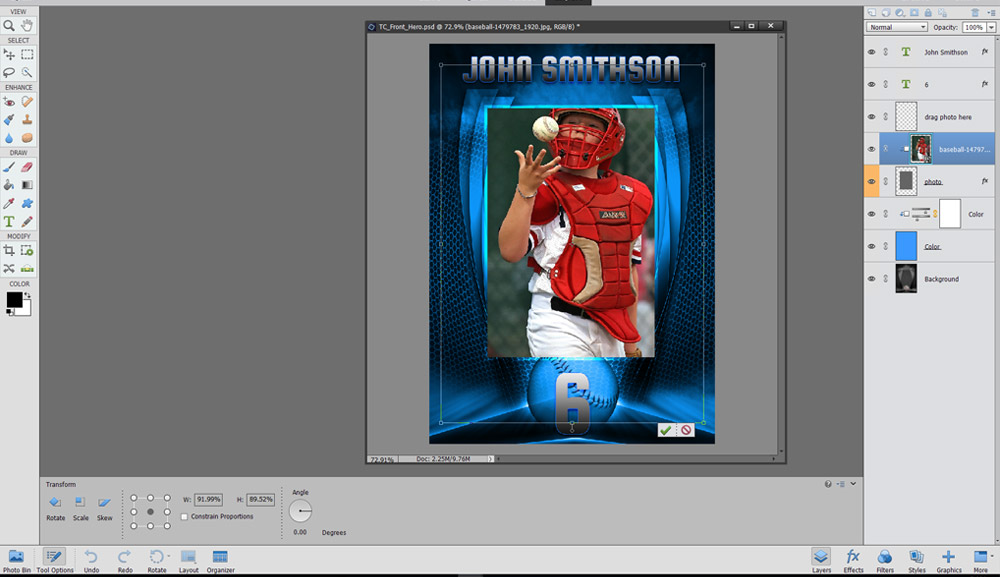
From this point, the image is clipped to the frame holder layer named “photo” and all you have to do is to resize, re-pose and anything necessary for your image to look great into the template.
2. Change the Background Color
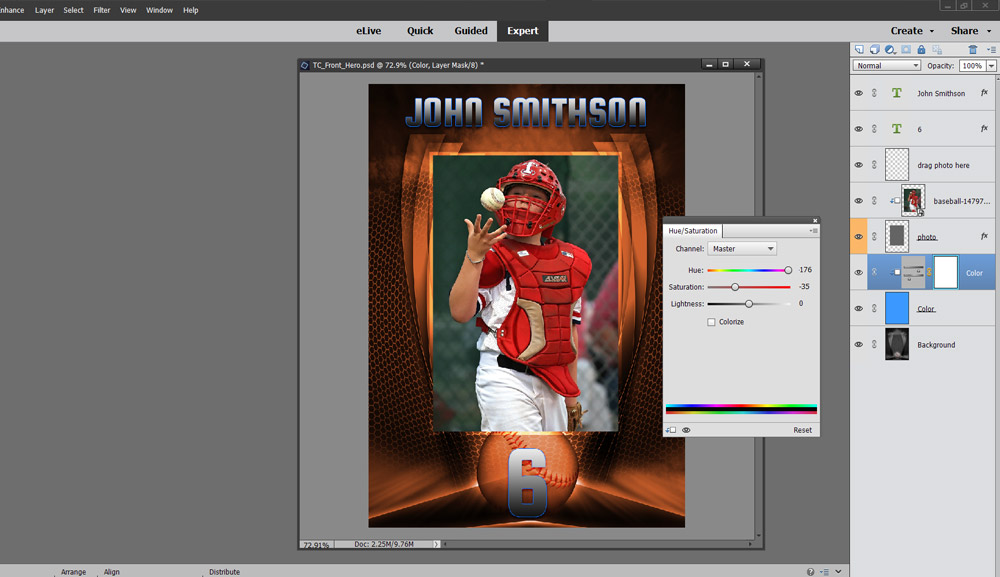
Most of the arc4Studio’s templates have an adjustment layer for color correction. To open the controls simply double click on the adjustment layer icon (see the sliders) and modify the Hue / Saturation to change the overall color for the background.
3. Edit Texts
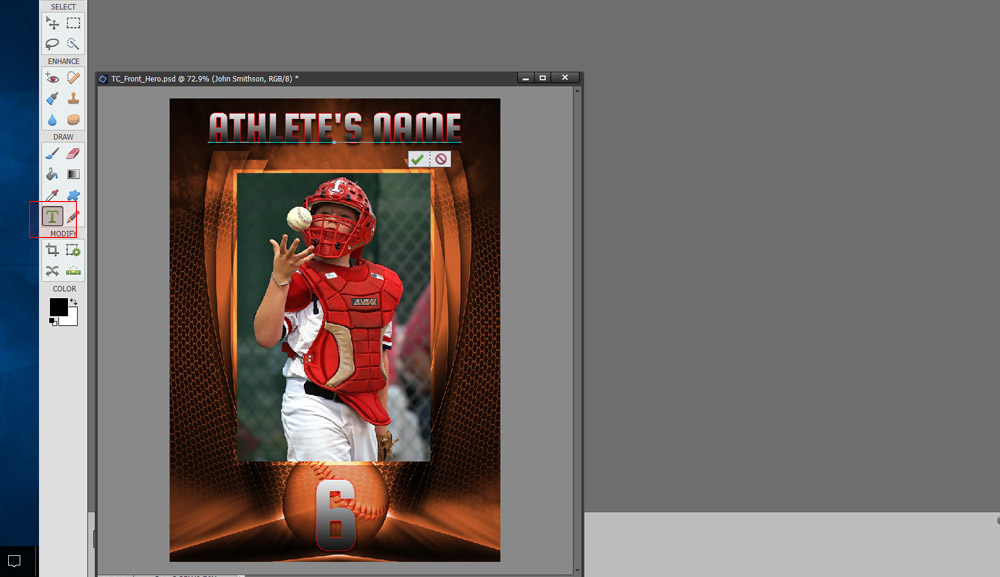
What makes arc4Studio templates so powerful is the fact they are totally customizable. We put different effects on layers to change dramatically the overall look of the layouts. In this example, I changed the athlete’s name color stroke to match the background and the player’s uniform. To access the Style Settings, double click on the layer.
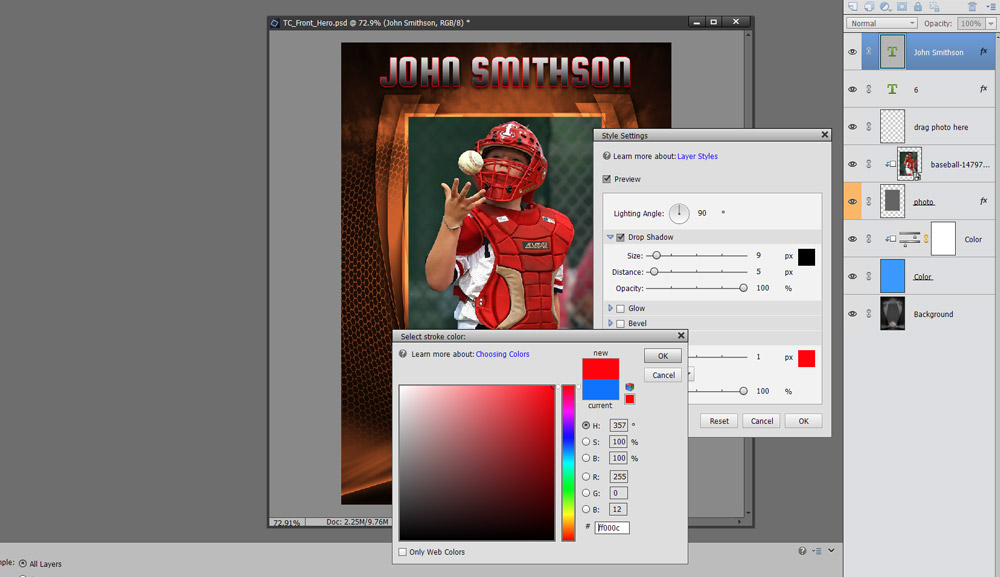
To edit texts, you have to change the tool first, from Move to Text. Select the Text tool from the left menu and then click on the text that you want to edit and start typing.
