Drag and Drop (quick method)
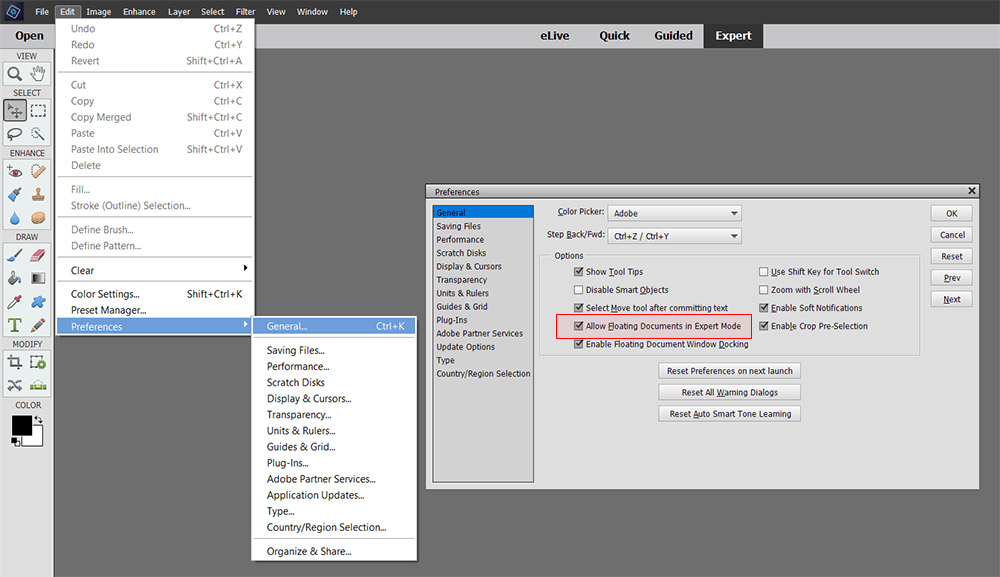
This is a short tutorial about how to add images in Photoshop Elements in few steps using the “Drag and Drop” method. Before the beginning, please be sure you are using the Expert mode and the new documents are open as individual floating windows. For this, go to Edit – Preferences – General and check “Allow Floating Documents in Expert Mode“.

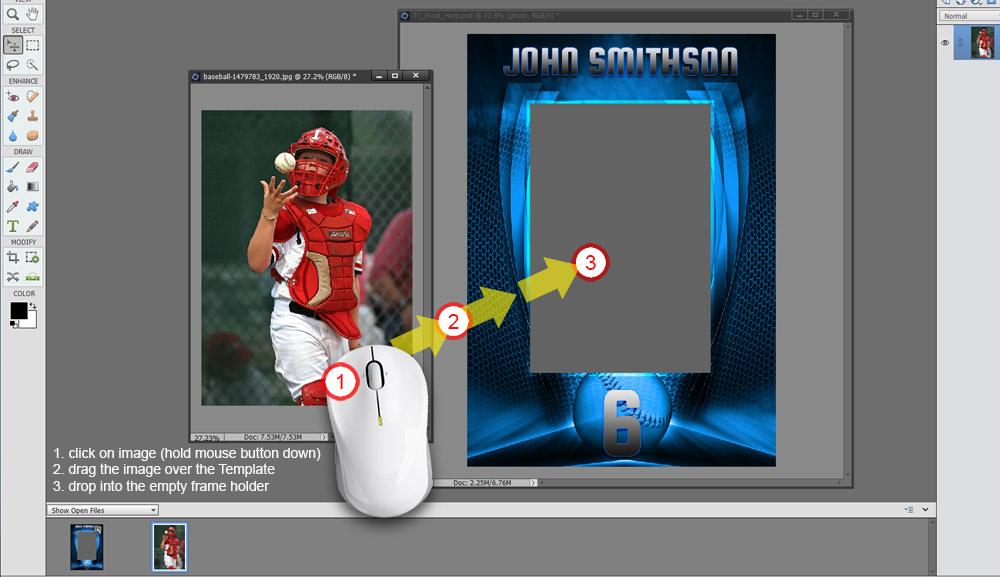
Open the template and select the frame holder by click on it. Open the image(s) that you want to use. You can drag the image directly from the Organizer (Show Open Files) and drop into the Template or you can open the Image document, click on it and hold the mouse button down while you dragging on top of the Template and drop it there (release the button).

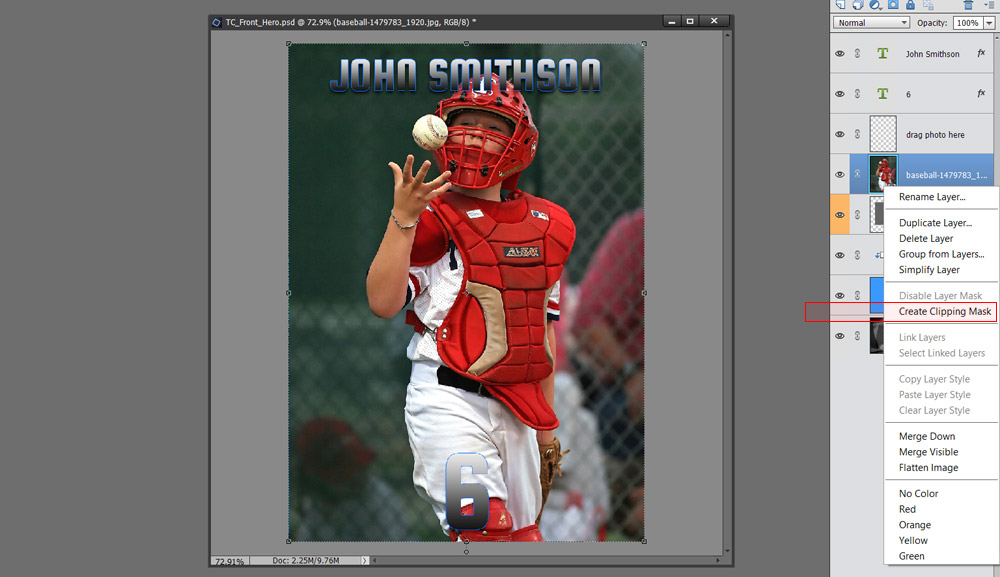
Under the Layers, check if the new added image layer is right above the frame holder layer named “photo”. If not, select the layer and move it up/down to be on top of the “photo” layer (see the image). Right-Click on the image layer (ctrl+Click on Mac) and choose “Create Clipping Mask”.

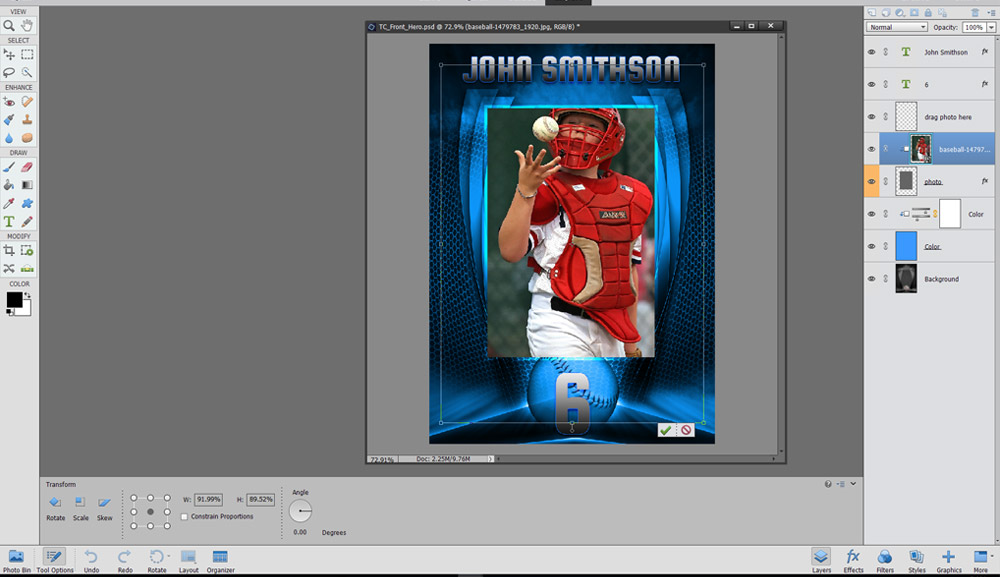
From this point, the image is clipped to the frame holder layer named “photo” and all you have to do is to resize, re-pose and anything necessary for your image to look great into the template.


