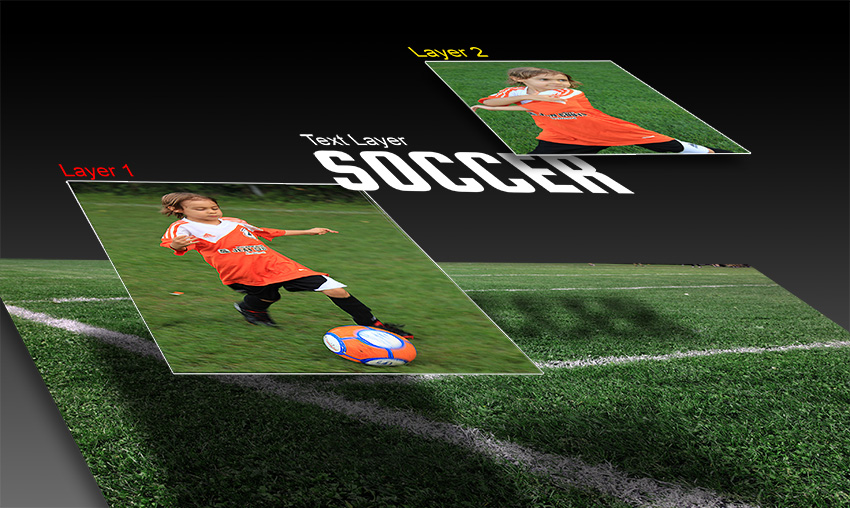
This tutorial presents the basics on understanding layers in Photoshop. For the beginners this could be the foundation to understand how Photoshop could work to improve your photography considerably. For the experienced users we gone review here the clipping mask technique.
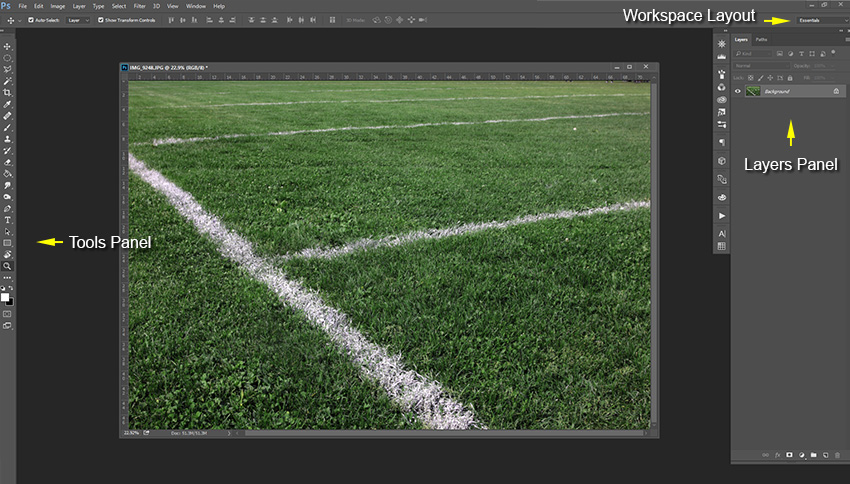
Let’s start with the beginning and create a simple layout as an example. Be sure that the workspace is setup properly (we recommend the Essentials or Photography) and the basic panels (tools and layers) are open. If you don’t see the Layer’s panel (placed usually on the right side of the screen), simply go Window/Layers or hit f7.
A new image has a single layer. On the recent versions, Photoshop automatically named this layer: Background. That’s the first clue that all the new layers will be placed on top.
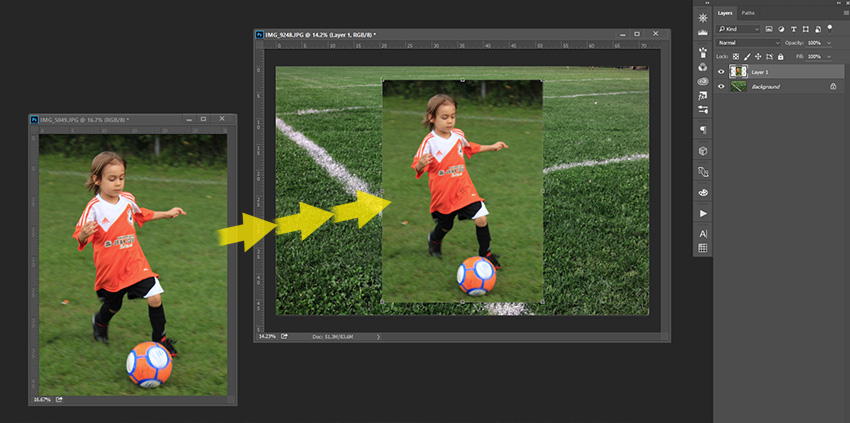
Now, let’s add another image on our layout. We prefer the easy, simple way to do it and that’s the drag and drop.
- Open the new image (Tips: double click on the workspace, see the intro tutorial)
- use the move tool (hit V – or – select the first tool on the left side panel)
- click on the new image, hold down the mouse button, drag it over the previous image and drop it on top by releasing the button
- resize if it’s necessary
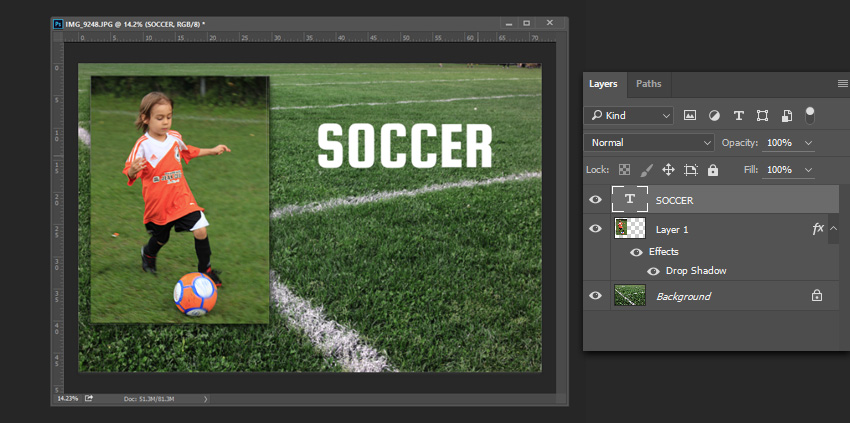
We have the soccer player on top of our background (the grass field image). Now, let’s add some text to our layout. Using the Text tool from the left side tools panel (the one with the T symbol), type “Soccer”. A new layer is created on top. Here is how our layer’s structure looks: on top the most recent layer automatically created for the “Soccer” text, then the player’s image added and at the bottom, our “background”.
To have a complete idea, I’m gone add a new image to our layout in the same manner (open the image on a new floating window, click on it, hold down the mouse button and drag it on top of our layout and once you see a lighting border, release the image). Please note that I resized all the dropped images.
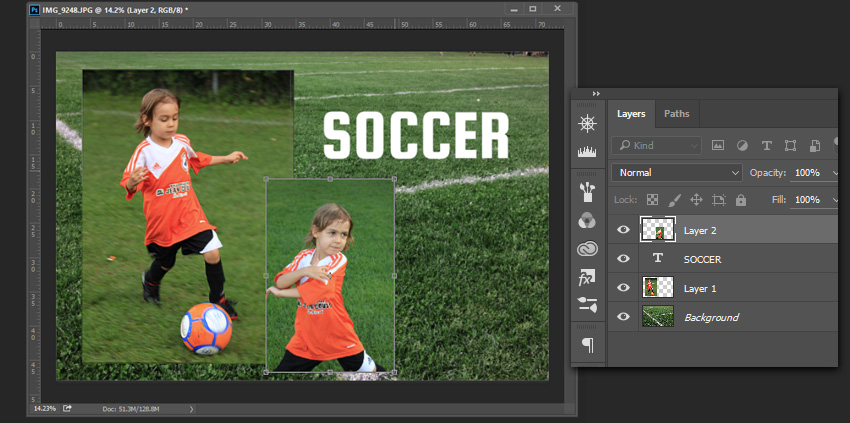
To understand more how these layers are placed, I created a 3D image for this example layout: “Layer 2” on top, the Text layer “Soccer”, “Layer 1” (first image added) and at the bottom the start image.
